
AI Agent Studio
Follow the role, mission, dataset, skills, and output steps to create a custom agent.
Start a new agent
Open More.. → Super Admin → AI Agent Studio, then select the AI Agent Studio creation card. The guided flow shows your choices in Your pipeline. Available options depend on your permissions and deployment.

Choose a role and mission
Role sets the agent’s intended expertise and working style. Examples include Researcher, Learning Coach, Customer Support, and L&D Designer. Choose the role closest to the task, then continue.
Mission tells the agent what to accomplish. Describe the audience, task, expected result, and how it should use the source material. You can write a mission or choose Saved prompts from the prompt library.
The Mentor with Memory role requires a journey document to guide the mentoring experience. Use the journey upload control when that role is selected; other roles do not need that document.
Select a dataset
Choose the knowledge collection in Dataset, then select Use dataset. Confirm its name in Your pipeline before continuing. If it is missing, first create or upload the dataset.
Add optional skills
When enabled, Skills lists active MCP servers the agent can use. Select View tools to inspect a server before adding it. The interface shows the selection count and limit; the current flow supports up to four servers.
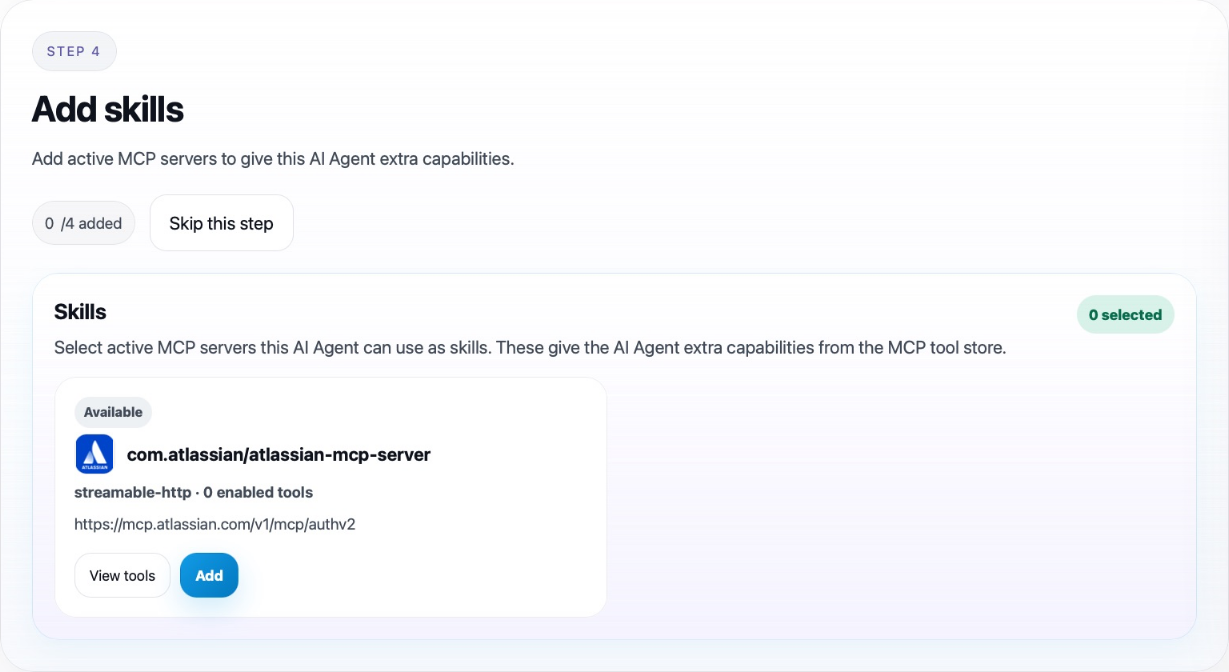
Select Skip this step when no additional tools are needed. A skill’s usefulness depends on its connection and enabled tools; adding a server with no usable tools does not provide working actions. See MCP Tool Store.
Choose an output and save
Output determines where people will use the agent. Depending on your permissions, the choices can include Talvi AI Agent, Talvi Embeddable AI Bot, Slack app, and Microsoft Teams app.
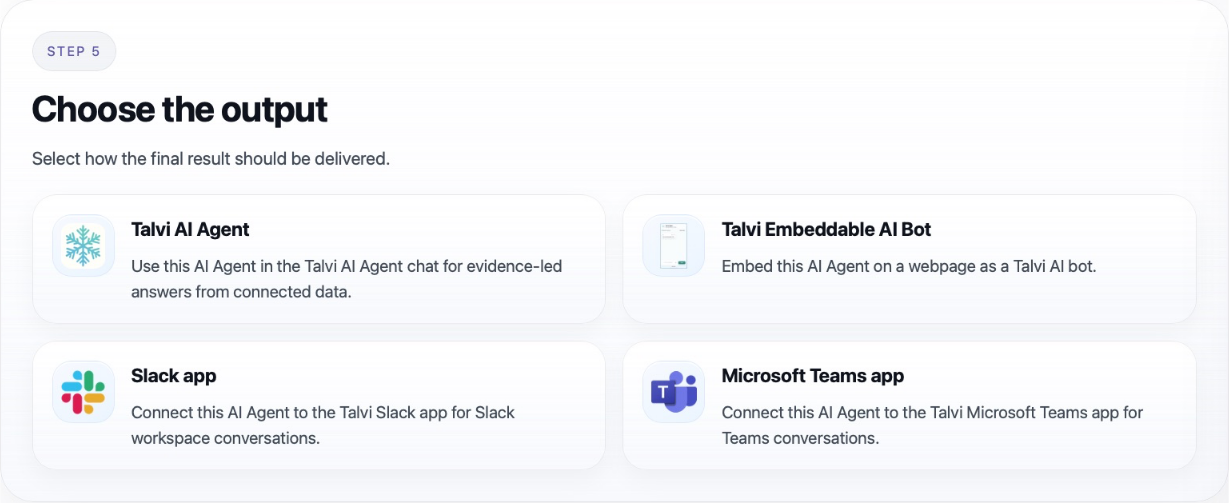
Complete any output-specific details, review the pipeline, and select Save AI Agent. Use a clear name so administrators and users can identify it. After saving, open its detail page to check the mission, audience, and connection details.
Selecting an output alone does not complete the external Slack or Teams installation. Those connections require their corresponding app setup and credentials.